
How To Start Growing Marijuana
Table of Contents
So, you’re thinking about growing marijuana at home, but you’re not sure where to start. Don’t worry! This guide will break down all the basics you need to know to get your cannabis garden thriving, even if you’re a complete beginner. Follow along, and you’ll be growing like a pro in no time!
If you want to grow your own cannabis, you’re already on the right track by reading this guide. Even if some of the terms are new to you, learning more about the growing process will help when you’re ready to start your own grow.
Finding the Right Seeds for Your Growing Marijuana
Finding the Right Cannabis Seed is an essential step in starting your cannabis grow. The seeds you choose will play a significant role in the overall success and quality of your harvest. When selecting cannabis seeds, you’ll need to consider factors such as strain, growth environment, and your personal preferences in terms of taste, effect, and yield.
There are different types of cannabis seeds, such as regular, feminized, and autoflowering, each with its own unique benefits. Feminized seeds are particularly popular because they ensure that your plants will be female, which is crucial for producing the buds you want to harvest. Autoflowering seeds, on the other hand, are great for beginners as they automatically switch from the vegetative phase to the flowering phase without needing specific light schedules.
Additionally, think about the strain you want to grow. There are many options, including sativa, indica, or hybrid strains, each offering different effects and growing characteristics. It’s important to choose a strain that suits your climate, space, and growing experience.
Ultimately, the right choice of cannabis seeds will set the foundation for your growth, helping you produce healthy, potent plants. By understanding your needs and doing a little research, you’ll be on the right path to choosing the best seeds for your garden.
Pure Seed Genetics – Cannabis Seeds
-
Northern Lights
Price range: $39.00 through $180.00 -

Blue Haze
Price range: $39.00 through $180.00 -
CBD Blueberry
Price range: $39.00 through $180.00 -
Zkittlez Feminized
Price range: $39.00 through $180.00
Sativa
Sativa plants grow taller, with thinner leaves and longer stems. They also take longer to fully flower compared to Indicas. When it comes to effects, Sativas are generally more energizing and stimulating, rather than relaxing or sedating like Indicas.
Some common effects of Sativa strains include:
- Mental stimulation
- Increased physical energy
- Enhanced creativity
- Euphoria or a sense of happiness
However, most cannabis strains today are hybrids, meaning they are a mix of both Sativa and Indica genetics. Hybrids can lean more toward Sativa or Indica, or be a balanced 50/50 mix. This means their growth characteristics and effects can vary widely based on both their genetic makeup and the environment they are grown in.
While there’s no single “best” strain, beginners often go for Indica-dominant strains since they are easier to manage, tend to grow shorter, and have a faster flowering time.
Indica
Indica plants are typically shorter and bushier, with thick stems and wide leaves. They have a relatively short flowering period and usually produce larger, denser buds. Indicas are often referred to as “nighttime” strains because they tend to provide a relaxing, sedative effect, making them ideal for evening or bedtime use.
Common effects of Indica strains include:
- Couch-lock (feeling stuck to the couch, unable to move)
- Sedation (feeling deeply relaxed or sleepy)
- Munchies (increased appetite)
- Body high (a deep, soothing feeling throughout the body)
- Deep relaxation (helping to ease stress and tension)
Indicas are often chosen for their calming and restful effects, making them great for winding down or helping with sleep.
Autoflowering
cannabis refers to a type of cannabis plant that automatically switches from the vegetative stage (where it grows leaves and stems) to the flowering stage (where it produces buds) based on age rather than light cycles. This is different from regular cannabis plants, which rely on changes in light (such as shorter days) to trigger flowering.
Autoflowering plants are usually smaller in size compared to regular photoperiod plants and have a faster growing cycle. From seed to harvest, they can be ready in as little as 8 to 10 weeks, making them a great choice for beginners or those looking for a quicker turnaround.
Since autoflowering plants don’t need specific light schedules to flower, they are more flexible and can be grown in smaller spaces or places with inconsistent light. This makes them ideal for those growing indoors or in regions with limited sunlight hours.
Overall, autoflowering cannabis is appreciated for its speed, ease of care, and compact size, making it a popular option for both new and experienced growers.
Growing Medium
Once you have your cannabis seeds, the next step is to select the appropriate containers to hold the soil. For a successful start, pots that can hold between 7 to 11 liters of soil are usually the best choice. This size allows enough space for your plants to grow and develop healthy roots. It’s important that these containers have drainage holes at the bottom. Without these holes, water can accumulate at the base of the pot, creating stagnant moisture that cannabis plants don’t tolerate well. Stagnant water can lead to root rot and other issues, so ensuring proper drainage is essential for your plants’ health.
When it comes to choosing the right soil, many growers opt for universal potting soil, which can be found in most garden stores. However, it’s important to note that not all potting soils are created equal. While a general-purpose potting mix can work, lower-quality soils may not provide the necessary nutrients or air circulation that cannabis plants require for optimal growth. Cannabis plants need soil that is rich in nutrients but also well-aerated to allow proper root development. Soil that is too dense or compact can restrict airflow and water drainage, hindering the roots’ ability to take up nutrients and oxygen.
If you have a good-quality potting soil but want to make it even better for your cannabis, consider adding perlite. Perlite is a lightweight, white, volcanic material that helps improve soil aeration and drainage. By adding perlite to your potting mix, you can help create a better environment for the roots to grow, ensuring that they get enough oxygen while avoiding waterlogged conditions. Perlite helps keep the soil loose and light, promoting healthy root expansion and faster growth.
In addition to regular potting soil and perlite, there are specialized soil mixes available that are specifically designed for growing cannabis. These pre-mixed soils are carefully formulated to provide the right balance of nutrients for the early stages of plant growth. Most cannabis-specific soil mixes contain the necessary amounts of nitrogen, phosphorus, potassium, and other essential nutrients to support the vegetative phase of the plant. These high-quality soils often come with perlite already mixed in, which further enhances drainage and airflow for the roots. Using these specialized mixes can save time and effort, as you won’t need to add extra nutrients for the first few weeks of growth, and your plants will have the optimal conditions to thrive.
One thing you should definitely avoid is using soil straight from your garden. While it might seem convenient to just dig up dirt from outside, garden soil is not suitable for cannabis cultivation. It doesn’t contain the right balance of nutrients needed for healthy cannabis growth, and more importantly, it could harbor unwanted pests, fungi, or pathogens. These contaminants can easily spread to your plants and cause diseases or infestations that are hard to control. Using garden dirt also runs the risk of bringing in weeds or other unwanted plants, which can compete with your cannabis plants for nutrients and space. For the best results, always use soil that is either specifically formulated for cannabis or a high-quality potting mix that you can amend with additives like perlite.
Lighting
Lighting Is one of the most important factors when growing cannabis, as it directly impacts plant health, growth, and overall yield. Cannabis plants need light for photosynthesis, which is the process that allows them to convert light energy into the food they need to grow. In the vegetative stage, cannabis plants require a lot of light to produce strong stems, leaves, and roots. However, when it comes time for flowering, cannabis plants need even more light to trigger the blooming process and produce buds.
The intensity and quality of light you provide your plants will influence how well they develop, especially in the flowering stage. If the plants don’t receive the proper amount of light, they may grow slowly, produce fewer buds, or have weak and stretched-out stems. Conversely, too much light or incorrect lighting can cause light stress, which can damage the plant.
Types of Lighting for Cannabis
- Natural sunlight: If you’re growing cannabis outdoors, the sun is the best natural light source. Cannabis thrives in full sunlight, especially during the spring and summer months when the days are long. However, if you are growing indoors or in regions with limited sunlight, artificial lighting becomes necessary.
- LED lights: LED lights are popular for indoor cannabis grows because they provide high light intensity while being energy-efficient. They can be customized to emit the ideal light spectrum for different growth stages—blue light for vegetative growth and red light for flowering. LEDs also produce less heat than other lighting options, reducing the risk of heat stress.
- High-Pressure Sodium (HPS) lights: HPS lights are commonly used in the flowering stage of cannabis growth because they emit a light spectrum rich in red and orange wavelengths, which help promote bud production. However, they tend to generate a lot of heat, so proper ventilation is necessary to avoid overheating the plants.
- Metal Halide (MH) lights: MH lights are commonly used during the vegetative stage because they emit a cool blue light that encourages healthy leaf and stem growth. These lights are also energy-efficient but produce more heat than LEDs.
- Fluorescent lights: While not as powerful as LEDs or HPS lights, fluorescent lights (like T5s) can be a good option for smaller grows or for seedlings and clones. They provide a lower light intensity, so they’re best for early growth stages.
Light Cycles
Cannabis plants also need specific light cycles, especially if you’re growing indoors. The amount of light a plant gets each day can trigger different growth stages:
- Vegetative stage: During this stage, cannabis plants need around 18-24 hours of light per day. The more light they receive, the more energy they have for growth.
- Flowering stage: To trigger flowering, cannabis plants need a light cycle of 12 hours of light and 12 hours of darkness each day. This change in light duration tells the plants that it’s time to bloom and produce buds.
Importance of Consistency
For cannabis plants to grow optimally, consistent lighting is crucial. Fluctuating light cycles or interruptions in light (like turning the lights on and off during the night cycle) can stress the plants and cause them to hermaphrodite (produce both male and female flowers) or produce poor-quality buds.
In summary, your lighting setup will play a significant role in determining how healthy and productive your cannabis crop is. Whether you are growing indoors or outdoors, providing the right intensity, spectrum, and light cycle at each stage of growth will help your plants reach their full potential and produce high-quality buds. The key is finding the right balance for your growing space and the specific needs of your plants.
Wattage
Wattage refers to the amount of electrical power a light or device uses, and it plays an important role in growing cannabis. The wattage of your grow lights determines the intensity of the light they produce. Higher wattage typically means brighter light, which can have a direct impact on plant growth.
In cannabis cultivation, plants need plenty of light, especially during the flowering stage, for strong growth and healthy buds. If the wattage is too low, the plants might not receive enough light to thrive, leading to poor growth, weak stems, and smaller buds. On the other hand, if the wattage is too high, the light can cause excessive heat, which could stress or damage the plants. So, finding the right wattage is crucial for creating the optimal growing environment.
The size of your growing area also affects how much wattage you’ll need. A small grow tent or space may only need a 300-watt light to provide enough light for the plants, while a larger grow area will require a higher wattage light to ensure even coverage and proper light intensity for all the plants.
Different types of lights, like LED, High-Pressure Sodium (HPS), or Metal Halide (MH), have different efficiencies in terms of light output for the wattage they consume. For example, an LED light with 600 watts may produce the same or more light than a 1000-watt HPS light because LEDs are generally more efficient at converting energy into light. This means wattage alone doesn’t always determine how much light the plants actually receive, so it’s important to consider the type of light you’re using.
Higher-wattage lights will also consume more electricity, which leads to higher energy costs. Therefore, it’s essential to balance the wattage of your lights with the energy costs to ensure your plants get the light they need without overspending on electricity.
In summary, wattage is a key factor in determining how much light your cannabis plants receive, which in turn affects their growth and health. Finding the right wattage for your growing space and choosing energy-efficient lights will help ensure your plants get the optimal conditions to thrive.
Light cycles
Unless you’re growing autoflowering plants (which can stay under 18-24 hours of light from start to finish), you’ll need to adjust your light schedule based on the plant’s growth stage.
For the vegetative stage, the light schedule is typically 18 hours on and 6 hours off. This stage can last as long as you want, but most growers keep it for about 3–4 weeks, or until the plant has grown to the desired size.
Once your plant enters the flowering stage, switch the light cycle to 12 hours on and 12 hours off. It’s important that the dark period stays uninterrupted because any light during the night cycle can stop your plants from flowering properly.
Using a timer for your lights can make it easier to stick to these schedules.
Airflow and Ventilation
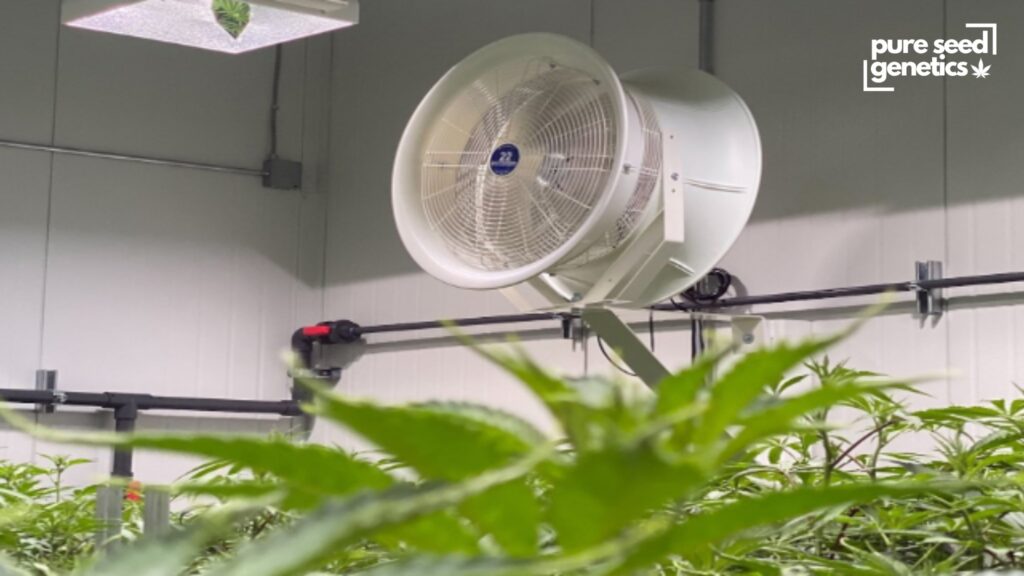
Airflow and ventilation are crucial for healthy cannabis growth. Proper airflow helps provide your plants with fresh oxygen, which is essential for photosynthesis, while also preventing the buildup of heat and humidity that could lead to mold or other issues. Good ventilation ensures that hot air from grow lights is removed, and fresh air is constantly circulating to maintain the right temperature and humidity levels. Proper airflow also helps strengthen your plants’ stems by mimicking natural wind conditions, which helps them grow sturdier. In short, a well-ventilated grow space promotes healthy plants and better yields.
Extractor
In a cannabis grow room, extractors are ventilation fans that remove stale, hot, and humid air, ensuring fresh airflow for healthy plant growth. They help control temperature, humidity, and CO2 levels, preventing mold and mildew. Extractors also filter odors, especially during the flowering stage, to keep smells from spreading. Essentially, they maintain the optimal environment for cannabis plants to thrive.
Airflow
Airflow for healthy cannabis growth. To evenly distribute the fresh air coming into the space, you need one or more ventilators. These help ensure that CO₂, heat, and moisture are spread evenly throughout the grow room, preventing hot spots and reducing the risk of mold. Setting up fans to gently blow air on your plants also helps strengthen their stems, encouraging sturdier growth that can support heavy yields. Proper air circulation promotes overall plant health and better results.
Nutrition
Nutrition is a key factor in the healthy growth and development of cannabis plants. Just like any other plant, cannabis requires a variety of nutrients to thrive, which are typically divided into two categories: macronutrients and micronutrients.
Macronutrients are the primary elements that plants need in larger amounts. Nitrogen is essential for healthy leaf and stem growth, phosphorus supports strong root development and flower production, and potassium helps the plant develop strong stems and buds, promoting overall plant health. In addition to these, cannabis plants also need calcium, magnesium, and sulfur for proper metabolic function.
Micronutrients, although required in much smaller quantities, are still crucial for the plant’s health. These include iron, manganese, zinc, copper, and boron. Cannabis plants absorb nutrients primarily through their roots, but it’s the balance of these nutrients that matters most at different stages of growth. During the vegetative stage, plants need more nitrogen to encourage strong, leafy growth. In the flowering stage, they require higher amounts of phosphorus and potassium to support the development of buds and to increase overall yield.
If cannabis plants are overfed or underfed, nutrient imbalances can occur, leading to yellowing leaves, stunted growth, or poor-quality buds. Therefore, it’s important for growers to follow a feeding schedule that suits the plant’s needs and adjust the nutrient levels based on its growth stage.
Many growers opt for commercial nutrient mixes made specifically for cannabis, though organic fertilizers are also a popular choice. Regardless of the type of nutrition, it’s vital to regularly monitor the plants’ health and adjust the feeding regimen to ensure they are receiving the right amount of nutrients for optimal growth.
Choosing The Right Soil
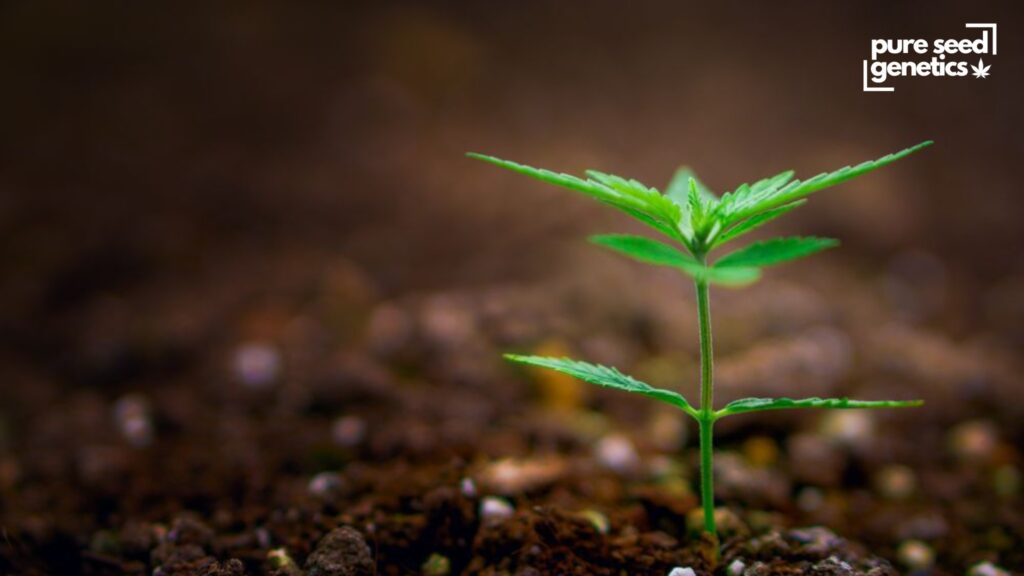
Fertilizers and nutrient solutions for cannabis are made up of three main macronutrients: nitrogen, phosphorus, and potassium. They also contain smaller amounts of micronutrients, such as iron and calcium, which are important for plant health. The amount of nitrogen, phosphorus, and potassium in a nutrient solution is often shown in a ratio like 3-1-6 or 0-4-5. These three numbers represent the levels of nitrogen (N), phosphorus (P), and potassium (K). Nitrogen and potassium are especially important during the vegetative (growing) stage, while more phosphorus is needed during the flowering stage to support bud development.
It’s important to remember that young plants, like seedlings, have different nutrient needs compared to fully grown plants. Seedlings, for example, don’t need many nutrients and can even struggle if overfed. Overfeeding cannabis is a common mistake among beginners. Sometimes, a plant that is overfed can show symptoms like yellowing leaves, which may look like a sign of nutrient deficiency. If your plants start showing signs of trouble, it’s often a good idea to give them a “flush” (watering the soil with clean water to wash out excess nutrients) and then restart with the correct nutrient levels.
By understanding the right nutrients for each growth stage and avoiding overfeeding, you can help your plants grow strong and healthy.
Water and PH Level
Improper watering is a common mistake for new growers, with overwatering being the most frequent issue. Overwatering can lead to various problems like fungus growth and pest infestations. However, proper watering is quite simple: it’s better to water less often than too frequently. You should allow the soil in your pots to dry out between waterings.
To check if it’s time to water, you can stick your finger about 1.2 inches into the soil. If it feels dry, it’s usually time to water. Alternatively, you can lift your containers to feel the weight. If the pot feels light, it likely means the soil is dry and needs watering. Keep in mind that your plants can handle a little underwatering better than being overwatered, so don’t be afraid to wait a bit longer before giving them water.
The pH level of your water or nutrient solution is for your cannabis plants to properly absorb nutrients. If the pH is off, even if nutrients are present, your plants may not be able to take them in, which can lead to nutrient lockout. This can cause your plants to become unhealthy or stop growing altogether. When growing in soil, the ideal pH range for cannabis is between 6.0 and 7.0. If the pH falls outside this range, it can prevent proper nutrient absorption.
It’s important to regularly check the pH levels of your water and nutrient solution, as the pH can shift depending on the nutrients you add. If the pH is too high or too low, you can adjust it using pH “up” or “down” products. Keeping the pH within the right range ensures that your plants can take in the nutrients they need to grow strong and healthy.
Flushing
Flushing is the process of watering your cannabis plants with large amounts of clean water to remove excess nutrients, salts, and other buildup from the soil or growing medium. This is usually done in the final weeks before harvest to ensure your plants are free from any nutrient residues that could affect the taste, smell, or overall quality of the buds.
When cannabis plants are overfed, they can accumulate excess nutrients that may lead to nutrient burn, poor growth, or less flavorful buds. Flushing helps to wash away these excess nutrients, allowing the plant to use up the remaining nutrients in its system before harvest. It also helps prevent the plant from continuing to take in nutrients that may cause an imbalance during the flowering stage.
Why is Flushing Important?
- It removes nutrient buildup that can cause issues like nutrient burn, poor growth, or bad taste in the buds.
- Flushing ensures that the plant is free from excessive nutrients that can affect the final product, especially during the flowering phase.
- It helps improve the flavor, aroma, and overall quality of the buds by preventing any harsh, chemical-like taste.
When to Flush?
- Flushing is typically done 1–2 weeks before harvest to allow the plant to use up the remaining nutrients.
How to Flush?
- Water your plants with clean water that has the right pH level for your growing medium (typically between 6.0 and 7.0 for soil).
- Continue watering until the water runs clear from the drainage holes of the pots.
Benefits of Flushing
- Removes excess nutrients from the soil or growing medium.
- Prevents nutrient imbalances and encourages a smoother, more flavorful smoke.
- Helps the plant finish its growth cycle without excess chemicals or nutrients, improving the final quality of the harvest.
By flushing properly, you’ll ensure that your cannabis plants produce the best possible buds, with better taste, aroma, and overall quality.
Conclusion
Starting your own cannabis grow can be an exciting and rewarding experience. By following the right steps, from selecting the right seeds and growing medium to providing proper light, water, and nutrients, you can cultivate healthy plants and enjoy a bountiful harvest. Remember that patience and attention to detail are key—whether it’s maintaining the right pH levels, ensuring good airflow, or properly managing your light schedule. Each stage of growth, from seedling to harvest, requires specific care, and with practice, you’ll become more skilled in growing. Whether you’re growing for personal use or exploring the craft of cultivation, starting your marijuana grow with the right knowledge will set you on the path to success. Happy growing!

Pure Seed Genetics
Cannabis seeds for sale with free shipping across the USA, Europe, and Canada. Our weed seeds are bred to meet customer and breeders standards of growing of all levels and tastes.
Copyright 2026 © Pure Seed Genetics
